Table of Contents
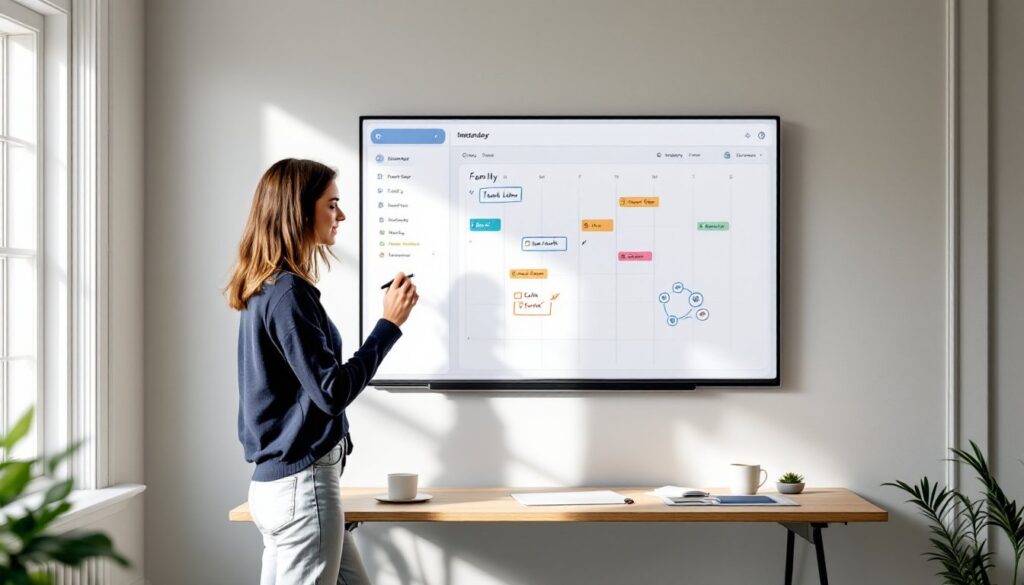
ToggleSmart whiteboards aren’t just for conference rooms anymore. These interactive displays have made their way into home offices, kitchens, and kids’ study spaces, and for good reason. They combine the functionality of a traditional whiteboard with digital capabilities like cloud sync, app integration, and touch interactivity. Whether someone’s organizing a family calendar, homeschooling, or brainstorming a side hustle, a smart whiteboard offers a central hub that’s easier to update than sticky notes and more visible than a phone app.
Key Takeaways
- A smart whiteboard combines digital capabilities like cloud sync and app integration with traditional writing functionality, making it ideal for home offices, kitchens, and study spaces.
- Smart whiteboards eliminate paper clutter, enable real-time remote collaboration, and provide instant backups through cloud storage, benefiting families and hybrid workers.
- Choose a smart whiteboard based on touch sensitivity, screen size (24-75 inches depending on use), and compatibility with existing apps like Google Drive, Microsoft 365, or Notion.
- Install your smart whiteboard at eye level in high-traffic areas like kitchens or home offices, ensuring stable Wi-Fi connection and proper wall mounting into studs for boards over 20 pounds.
- Proper calibration, cable management, and testing after installation prevent touch sensitivity issues and ensure the whiteboard syncs seamlessly with your household devices and routines.
What Is a Smart Whiteboard and How Does It Work?
A smart whiteboard is a digital writing surface that captures, saves, and shares handwritten notes or drawings. Unlike a standard dry-erase board, it connects to Wi-Fi or Bluetooth and syncs with smartphones, tablets, or computers.
Most models use one of two technologies. Capacitive touch screens detect finger or stylus input directly on a display, similar to a tablet. E-ink displays mimic paper and use styluses that don’t require charging, offering a more traditional writing feel with less glare.
Content created on the board can be saved as PDFs, images, or editable files. Many units integrate with apps like Google Drive, Microsoft OneNote, or proprietary platforms. Some boards include built-in cameras that scan handwritten content and convert it to digital text.
Smart whiteboards range from 32-inch portable panels to 75-inch wall-mounted displays. Portable units often run on rechargeable batteries and mount with adhesive strips or stands. Larger models may require wall anchors and access to an outlet.
They’re particularly useful in homes where multiple people need to access shared information, think meal plans, chore charts, or project timelines. The ability to update from a phone app and have changes appear on the board in real time eliminates the need for constant manual updates.
Top Benefits of Installing a Smart Whiteboard in Your Home
Organization without clutter. Paper calendars, to-do lists, and random notes pile up fast. A smart whiteboard consolidates all that into one visible, updatable surface. Family schedules, grocery lists, and reminders stay in one place without the visual noise of magnets and paper scraps.
Remote collaboration. For households with hybrid work setups or kids in online learning, smart whiteboards enable real-time collaboration. Parents can leave notes for teens, or remote workers can share diagrams during video calls without toggling between apps.
Reusable and eco-friendly. A household that uses a whiteboard daily can eliminate hundreds of sheets of paper annually. Many homeowners with connected living setups appreciate the reduction in disposable materials.
Easy integration with existing tech. Most smart whiteboards pair with voice assistants, smart displays, and productivity apps. Someone managing a household can ask Alexa to add an item to the whiteboard or pull up a shared calendar without touching a device.
Enhanced learning for kids. Families homeschooling or supplementing schoolwork find that interactive boards keep kids engaged longer than paper worksheets. Drawing, solving math problems, and annotating images feel more dynamic on a touch surface.
Instant backups. Notes don’t disappear when someone accidentally erases them. Cloud sync ensures every brainstorm session, sketch, or list is archived and retrievable from any device.
Best Smart Whiteboard Features to Look For
Touch Sensitivity and Screen Size
Touch sensitivity determines how naturally the board responds to writing. High-quality models detect pressure levels, allowing for varied line thickness, useful for sketches or emphasis. Cheaper units may lag or miss strokes, which frustrates users quickly.
Look for boards that support palm rejection, so hands resting on the surface don’t create stray marks. This feature is standard on premium models but inconsistent on budget options.
Screen size depends on use case. A 24-inch to 32-inch board works for personal task management or a small home office. A 55-inch to 75-inch display suits family command centers or homeschool setups where multiple people view the board simultaneously.
Keep in mind that larger screens require more robust mounting. A 75-inch board can weigh 40-60 pounds, so wall studs and appropriate anchors are non-negotiable. For renters or those avoiding wall penetration, wheeled stands offer portability but take up floor space.
App Integration and Cloud Storage
The best smart whiteboards sync seamlessly with Google Workspace, Microsoft 365, Notion, Trello, or Slack. This allows users to export notes directly into project management tools or shared drives without manual transfers.
Some boards include proprietary apps with limited third-party support. Before buying, check whether the board’s ecosystem fits existing workflows. A board that only syncs with its own app creates friction if the household already relies on Google Calendar or Apple Notes.
Cloud storage capacity varies. Entry-level models may offer 5GB of free storage, which fills quickly with high-resolution images. Others include unlimited cloud backups as part of a subscription. Factor in ongoing costs if the board requires a monthly fee for full functionality.
Multi-device access is crucial. The board should allow family members to log in from their own phones or tablets, view shared boards, and make updates remotely. This turns the whiteboard into a true household hub rather than a single-user device.
Where to Install Your Smart Whiteboard at Home
Home office. Wall-mounting at eye level next to a desk keeps tasks and deadlines visible without cluttering the workspace. Ensure the board is within arm’s reach for quick edits but doesn’t block natural light from windows. Many remote workers integrate whiteboards with home automation systems for seamless scheduling.
Kitchen or mudroom. High-traffic areas benefit most from shared boards. Mount the whiteboard where everyone passes through, near the back door, on a pantry wall, or above a countertop workspace. Avoid placing it directly above a stove or sink, where heat and moisture can damage electronics.
Kids’ study area. A smart whiteboard in a playroom or assignments nook encourages independent learning. Install it at a height where children can reach comfortably without a step stool. For younger kids, 40-50 inches from the floor works well. Teens can handle standard desk height, around 30 inches from the floor to the bottom edge.
Garage workshop. DIYers managing project plans, cut lists, or tool inventories can mount a board on a garage wall. Choose a model with a protective screen cover if the space sees sawdust or temperature swings. Ensure the board is at least 6 feet from any stationary power tools to minimize vibration and dust exposure.
Bedroom or entryway. A small smart whiteboard near the front door works as a catch-all for reminders, package tracking, and appointment notes. In bedrooms, they serve as digital journals or vision boards. Keep these installs minimal, 10-inch to 20-inch boards, so they don’t overwhelm the space.
Regardless of location, confirm Wi-Fi signal strength in the chosen spot. Smart whiteboards rely on stable connections for syncing. If the signal is weak, consider a mesh network extender before installation.
Smart Whiteboard Setup: DIY Installation Tips
Choose the mounting method. Most smart whiteboards come with VESA-compatible mounts (standard hole patterns for screen brackets) or adhesive hanging strips. For boards over 20 pounds, wall anchors into studs are mandatory. Drywall anchors alone won’t support the weight safely. Use a stud finder to locate solid framing, typically 16 inches on center in most homes.
Mark and level. Measure the desired height and mark the top edge of the board with a pencil. Use a 4-foot level or a laser level to ensure the line is straight. Even a 2-degree tilt becomes noticeable on a large display. Mark mounting hole locations with a template (usually included) or by measuring from the board’s bracket.
Drill pilot holes. Use a 3/16-inch drill bit for standard wood studs. For metal studs, use self-tapping screws rated for the board’s weight. If mounting to concrete or brick, a masonry bit and sleeve anchors are necessary. Wear safety goggles and a dust mask when drilling into concrete.
Install the bracket. Attach the mounting bracket to the wall first, using 3-inch wood screws for studs or appropriate anchors for other surfaces. Tighten screws until snug, but don’t over-torque, this can strip threads or crack drywall. Double-check level before final tightening.
Hang the board. Most smart whiteboards use a two-person lift for anything over 40 inches. One person supports the weight while the other aligns the board’s mounting plate with the wall bracket. Slide or hook the board onto the bracket per manufacturer instructions. Some models lock with a set screw, don’t skip this step.
Cable management. If the board requires a power outlet, run the cord through a cable raceway or behind-the-wall conduit for a clean look. For rentals, adhesive cord covers work. Avoid running cords across walkways or where they’ll be yanked by kids or pets. According to reviews of current smart whiteboard models, integrated cable channels simplify installs significantly.
Connect and calibrate. Plug in the board, download the companion app, and follow the on-screen setup. Calibration typically involves tapping dots or dragging lines to align touch sensitivity. Complete this step before mounting if the board is removable, it’s easier at desk height than on the wall.
Test the mount. Gently press on the board’s corners to ensure it’s secure. If there’s any wobble or creaking, re-check screw tightness and anchor integrity. For households learning how to integrate devices, this final check prevents future failures.
Safety note: Always turn off power at the breaker if running new electrical lines. DIYers comfortable with basic carpentry can handle standard installs, but if the board requires in-wall wiring or structural modifications, consult a licensed electrician. Building codes vary by jurisdiction, and improper electrical work can void insurance.
Tool list:
- Stud finder
- Drill with appropriate bits
- 4-foot level or laser level
- Screwdriver or impact driver
- Tape measure
- Pencil
- Safety goggles and dust mask
Material list:
- Mounting bracket (usually included)
- Wood screws (typically #10 x 3-inch)
- Drywall anchors (if not hitting studs)
- Cable raceway or cord covers
- Optional: wall plate for outlet if relocating power
Experts at Good Housekeeping recommend testing touch response after install to ensure no interference from nearby electronics. Some smart whiteboards experience lag if mounted too close to Wi-Fi routers or Bluetooth speakers.
For homeowners exploring broader tech upgrades, pairing a smart whiteboard with other connected devices creates a cohesive ecosystem where schedules, reminders, and automations work in sync. The key is starting with a solid, level mount and reliable power access.