Table of Contents
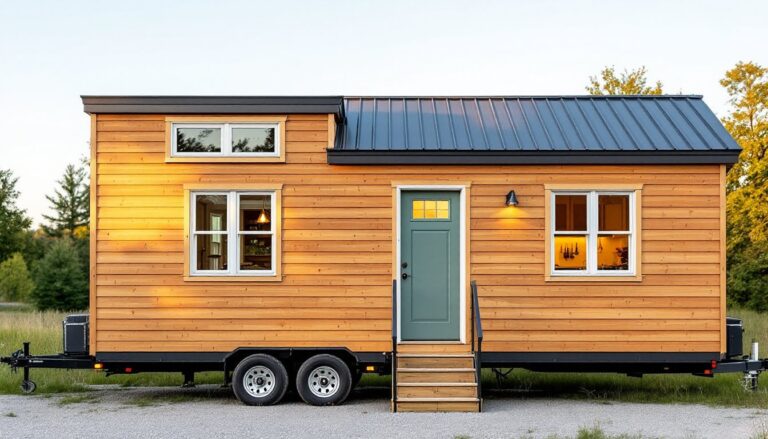
ToggleA 10×20-foot tiny house offers exactly 200 square feet of living space, small enough to build on a budget and skip the mortgage, yet spacious enough to include a real kitchen, a full bathroom, and sleeping quarters that don’t require you to crawl. It’s the sweet spot for first-time builders who want to learn framing, plumbing, and electrical without getting overwhelmed by a massive structure. Whether someone’s planning a backyard ADU, a mobile tiny home on a trailer, or a weekend retreat on rural land, a well-designed 10×20 floor plan can deliver comfort and functionality without wasted square footage.
Key Takeaways
- 10×20 tiny house floor plans deliver 200 square feet of functional living space, making them ideal for first-time builders seeking budget-friendly construction without overwhelming complexity.
- Maximize ceiling height to 10–11 feet and utilize windows on multiple walls to prevent claustrophobia and improve natural light and cross-ventilation in compact layouts.
- Multi-functional built-ins—such as Murphy beds, fold-down tables, and window benches with storage—must be planned during framing to reclaim square footage efficiently.
- Loft-style configurations are the most popular 10×20 design, freeing main floor space for larger furniture and better traffic flow while maintaining required 6’8″ headroom.
- Cluster plumbing on one wall, install a vented range hood, and choose low-flow fixtures to reduce costs and simplify maintenance in small kitchens and bathrooms.
- Anchor all tall shelving and furniture to wall studs, and aim to keep 10–15% of storage space open to prevent the home from feeling cramped or cluttered.
Why 10×20 Tiny Houses Are Perfect for Beginners and Budget-Conscious Builders
A 10×20 footprint sits right at the threshold where most jurisdictions classify a structure as a temporary dwelling or accessory building rather than a primary residence. In many areas, buildings under 200 square feet don’t require a full building permit, though this varies widely by county and state, so always check local codes before pouring a foundation or anchoring a trailer.
From a construction standpoint, a 200-square-foot build uses roughly one-third the lumber of a traditional 600-square-foot cabin. Expect around 20 sheets of 7/16-inch OSB sheathing, 30 to 40 2×4 studs (actual dimensions 1.5″×3.5″), and about 10 to 12 2×6 joists for a standard floor frame. That translates to material costs in the $3,000 to $6,000 range for the shell alone, not including windows, doors, or interior finishes, but regional lumber prices and supply chain shifts can swing that number by 30% or more.
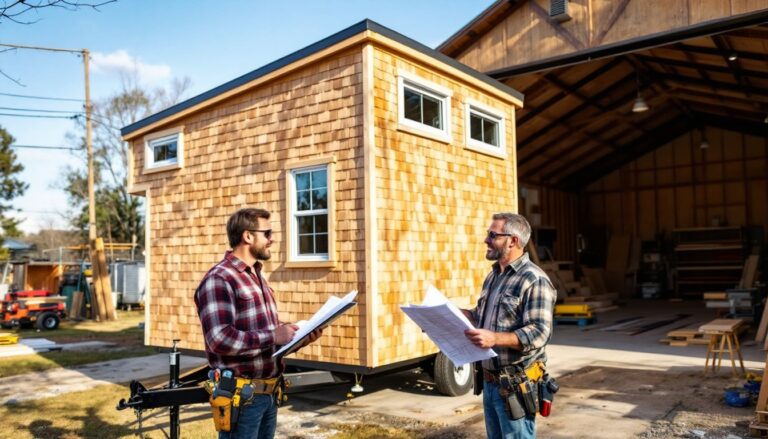
The compact size also makes it feasible to build solo or with one helper. Wall sections are light enough to lift without a crane, and roof trusses for a 10-foot span can often be assembled on the ground and raised by two people. For someone new to carpentry, this is a manageable scale to learn proper techniques without the pressure of a six-figure investment.
Essential Design Principles for 200 Square Foot Living Spaces
In 200 square feet, every decision compounds. A poorly placed door swing can block cabinet access: an oversized sofa eats up circulation space: a wall in the wrong spot kills natural light.
Ceiling height is the first leverage point. Standard 8-foot ceilings feel claustrophobic in a tiny footprint. Push to 10 or 11 feet if building codes and your framing skill allow. Taller walls create volume, improve air circulation, and open up loft possibilities without requiring a ladder climb into a cramped cave.
Multi-function furniture and built-ins aren’t optional, they’re structural. A window bench with flip-up storage, a fold-down dining table mounted to the wall, or a Murphy bed that reveals a desk underneath all reclaim square footage that freestanding furniture would waste. Plan these into the framing stage: adding blocking between studs for a wall-mounted folding table is trivial during construction but a headache to retrofit later.
Daylighting matters more in small spaces. A single 36-inch-wide window on one wall won’t cut it. Aim for windows on at least two walls, preferably opposite each other, to create cross-ventilation and reduce the cave effect. Egress requirements also come into play: if the sleeping area is in a loft, the International Residential Code (IRC) typically requires an emergency escape opening with a minimum 5.7 square feet of clear opening and a sill height no more than 44 inches above the floor. Verify local adoptions of the IRC.
Finally, resist the urge to divide the space with full-height walls. Use half-walls, sliding barn doors, or curtains to define zones without choking off light and airflow. The goal is perceived separation, not literal boxes.
Popular 10×20 Tiny House Floor Plan Layouts
Single-Level Open Concept Designs
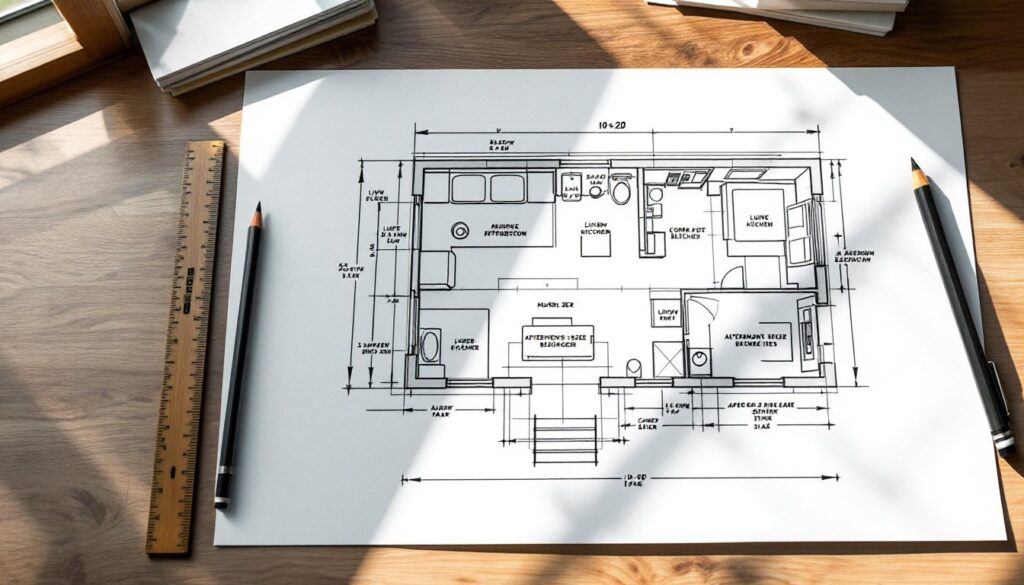
A single-level layout dedicates the full 200 square feet to one floor, with no loft. This works well for builders who want wheelchair accessibility, dislike ladders, or plan to age in place. Typical zoning: a 6×8-foot bathroom at one end (including a 30×60-inch shower pan and a corner sink), a galley kitchen along one long wall (usually 8 to 10 linear feet of counter and base cabinets), and a combined living/sleeping area in the remaining 120 square feet.
The trade-off is storage. Without a loft, vertical space is harder to exploit. Many single-level plans incorporate a Murphy bed or a daybed with drawers underneath to keep the floor clear during waking hours. Some builders add a small shed roof dormer or clerestory windows to boost headroom and light without expanding the footprint.
For those seeking free DIY furniture plans to outfit a compact layout, modular shelving and fold-down desks are popular starting points.
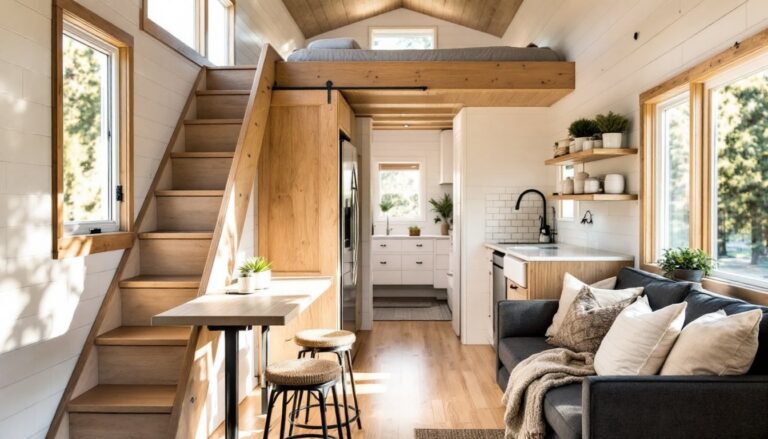
Loft-Style Plans with Sleeping Areas Above
Loft plans are the most common 10×20 configuration. A sleeping loft above the bathroom or kitchen frees up the main floor for a more spacious living area, full-size furniture, and better traffic flow. Standard loft dimensions run 6×10 feet or 7×10 feet, enough for a queen-size mattress (60×80 inches) with a few inches of clearance.
Headroom in the loft is the constraint. IRC code calls for a minimum 6 feet 8 inches of clear height over at least 50% of the loft area if it’s classified as a sleeping room. Many builders cheat this by designing the loft as “storage” on paper, then using it for sleeping anyway, gray area, proceed with caution. A gable or shed roof with a steeper pitch (8:12 or greater) helps carve out usable loft height without exceeding overall structure limits for trailered builds.
Access options: a standard staircase is the safest and most comfortable but eats up around 15 to 20 square feet of main floor space. Alternating tread stairs (ship’s ladders) cut that to about 10 square feet. A vertical ladder is the most compact but tough for late-night bathroom trips. If building for resale or rental, real stairs add value and meet more code requirements.
Zoning Your 10×20 Space: Kitchen, Bathroom, and Living Areas
Kitchen: A functional tiny house kitchen fits in 6 to 8 linear feet along one wall. Include a 24-inch-wide sink, a two-burner cooktop or a compact 20-inch range, and an apartment-size refrigerator (10 to 12 cubic feet). Skip the full-depth base cabinets, 12-inch-deep shelving on the opposite wall can hold dry goods and dishes without blocking the walkway. A butcher block countertop that overhangs slightly can double as a breakfast bar with a couple of stools tucked underneath.
Ventilation is non-negotiable in a small cooking space. Install a range hood that vents to the outside, not a recirculating model. Without proper exhaust, grease and moisture will coat the walls and breed mold faster than in a standard home.
Bathroom: A 5×6-foot or 5×8-foot wet bath is standard. Use a corner shower stall (32×32 inches minimum) or a neo-angle model to save space. Plumbing fixtures should be low-flow to reduce water usage, especially important if the tiny house is off-grid or on a limited septic system. A wall-hung toilet or a composting toilet can free up floor space and simplify plumbing rough-in.
Many experienced builders cluster plumbing on one wall to minimize drain and supply line runs. This reduces cost, simplifies DIY installation, and makes winterization easier if the structure will sit unused in cold months. Bathroom design ideas from small space living experts often highlight vertical storage and moisture-resistant finishes.
Living area: What’s left after kitchen and bath, typically 100 to 120 square feet, is the living zone. A loveseat or futon, a wall-mounted TV, and a small side table are about the limit if you want to move around comfortably. Keep furniture low-profile to preserve sightlines and make the room feel larger. A coffee table with storage or nested ottomans add function without clutter.
Storage Solutions That Don’t Sacrifice Style or Functionality
In a 200-square-foot house, every cubic inch counts. Vertical storage is the first rule: install shelves up to 8 feet high and use a step stool. Toe-kick drawers under base cabinets, under-stair storage cubbies, and overhead cabinets in the bathroom all capture space that would otherwise go unused.
Built-in benches with lift-up seats are workhorses. A window bench along a short wall can hold seasonal clothing, tools, or pantry overflow. Frame it during wall construction using 2×4 blocking between studs for solid support, then top it with a hinged plywood lid and a foam cushion.
Magnetic knife strips, pegboard walls, and hooks keep gear off counters. In the kitchen, mount a rail system for hanging utensils, dish towels, and cutting boards. In the sleeping loft, a tension rod across the gable end can serve as a closet bar for hanging clothes.
For builders focused on advanced construction techniques, integrating recessed shelving between wall studs during framing adds storage without eating into floor space. A 2×4 wall (3.5 inches deep) can house shallow shelves for spices, toiletries, or books.
Safety note: Anchor all tall shelving and furniture to wall studs, especially in a mobile tiny house. A sudden stop or sharp turn can topple unsecured units. Use L-brackets or furniture straps rated for earthquake zones, they’re more than enough for road travel.
Finally, resist the urge to fill every storage nook. Leave 10 to 15% open space for future needs and to prevent the interior from feeling like a storage unit. Tiny living works best when possessions are curated, not crammed.